00:00.0
00:01.5
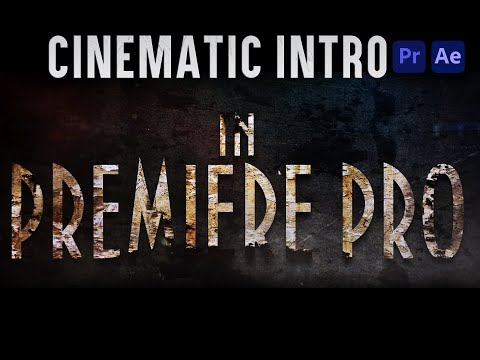
In This Tutorial we are going to create
00:01.6
00:03.5
Cinematic Intro.
00:03.6
00:05.0
Guys, Stick around and Keep watching
00:08.5
00:12.7
Whats Up Guys, This is Abhishek here with another tutorial
00:12.8
00:16.2
today we are going to create cinematic intro with..
00:16.3
00:21.0
Premiere Pro & After Effects. So Guys, Without any delay lets start
00:21.1
00:25.9
Let's give a look to our final video & then will begin our tutorial
00:38.7
00:43.5
first we create sequence. Click on New Item
00:43.6
00:50.1
Select sequence and select DNXHQ1080p 25
00:50.2
00:55.0
Change Sequence name and Press OK
00:55.1
00:59.9
Select Text tool and click on preview screen
01:00.0
01:04.8
font we are going to use is "Bankir Retro" and Increase...
01:04.9
01:09.7
to 300 and then enter Text
01:09.8
01:14.6
now select This only in text and decrease size..
01:14.7
01:19.5
to 200 & press Control A to select all text
01:19.6
01:27.4
and then reduce text spacing
01:27.5
01:32.3
then aline text to center by using tools
01:32.4
01:37.2
aline horizontally and vertically
01:37.3
01:43.4
zoom on timeline & then reduce text duration to 3 sec
01:43.5
01:48.3
now right click on text and select...
01:48.4
01:53.2
replace with after effect composition and it take us to After effects
01:53.3
01:58.1
rename project and save it
01:58.2
02:03.0
Now you can see 'This Summer' text in after effects
02:03.1
02:09.1
I already have 2 texture which we are going to use in this tutorial
02:09.2
02:14.0
select one texture and drag it under the text
02:14.1
02:18.9
Now aline texture as per text
02:19.0
02:23.8
Now we are going to use track matte and if you are..
02:23.9
02:28.7
not able to see track matte use toggle switch
02:28.8
02:33.6
under track matte select Alpha matte key
02:33.7
02:38.5
Now you see texture inside text. Now create copy of Text
02:38.6
02:43.4
press control+D to create copy and drag created copy under below texture
02:43.5
02:48.3
Now on visibility of copied text layer and go to Effects & Presets
02:48.4
02:53.2
type Drop Shadow and drag & drop it on duplicate text layer
02:53.3
03:06.6
increase oppacity to 100% and direction to 180, distance to 25
03:06.7
03:11.5
softness to 35 and select shadow only
03:11.6
03:16.4
now you can see shadow under our text
03:16.5
03:24.9
Go to Premiere Pro and you will see text with texture and shadow
03:25.0
03:29.8
transfer text to Video track 2, Now we are going to import files
03:29.9
03:34.7
right click and select import. Now select..
03:34.8
03:39.6
required files and press ok
03:39.7
03:44.5
now drag background click to video track 1 and reduce size to 3 sec
03:44.6
03:49.4
select background clip
03:49.5
03:56.0
go to effect control & on scale animation under motion
03:56.1
04:00.9
increase scale to 300 and then..
04:01.0
04:06.1
take play head few frames further and now change scale to 100
04:06.2
04:11.0
select start point of animation and right click on it and..
04:11.1
04:17.5
select ease out and on end point select ease in
04:17.6
04:22.4
open graph of scale by clicking on arrow point
04:22.5
04:27.3
extend animation end point
04:27.4
04:34.7
deselect automatic range tool
04:34.8
04:39.6
select nodes of start point and adjust accordingly
04:39.7
04:44.5
now drag animation end point to the end to clip
04:44.6
04:49.4
ajust graph accordingly
04:49.5
04:54.3
now select text, take playhead to start
04:54.4
04:59.2
on scale animation for text
04:59.3
05:04.1
increase text scale to 300 and take playhead few seconds further
05:04.2
05:09.0
and change scale to 70
05:09.1
05:13.9
select start point, right click and select ease out
05:14.0
05:18.8
select end point right click and select ease in
05:18.9
05:23.7
adjust graph as background clip
05:33.6
05:38.4
now select rotation & drag playhead to starting point
05:38.5
05:43.3
on rotation animation and set it to -7
05:43.4
05:48.2
drag playhead few seconds further
05:48.3
05:53.1
and now change rotation to 0
05:53.2
05:58.0
now right click on start point and select ease out & ease in open graph..
05:58.1
06:02.9
and adjust graph
06:03.0
06:07.8
off auto animation
06:07.9
06:12.7
In same way we create further texts
07:24.9
07:29.7
Now I have created all the texts
07:29.8
07:34.6
Now we give effects to other clips same as 1st clip
07:34.7
07:39.5
select first clip and right click on motion
07:39.6
07:44.4
and select copy and now select 2nd clip
07:44.5
07:49.3
right click on motion and select paste
07:49.4
07:54.2
now you will see same effect on 2nd clip
07:54.3
07:59.1
take playhead to starting point of 2nd clip & change rotation to 7
07:59.2
08:04.0
repeat same step on other clips and change rotation as per your choice
08:13.9
08:18.7
now we are going to use.
08:18.8
08:23.6
other clips to create cinematic intro
08:23.7
08:28.5
drag & drop background.jpg file on track 3 above text
08:28.6
08:33.4
decrease opacity to 90% and blend mode..
08:33.5
08:38.3
to Screen and extend clip to till end
08:38.4
08:43.2
select dust clip and drop it on track 4 above background.jpg
08:43.3
08:49.3
change blend mode to screen
08:49.4
08:54.2
and decrease opacity to 80% and extend it till end
08:54.3
08:59.5
Now we are going to add optical flare
08:59.6
09:05.4
select optical flare, drag & drop it on track 5 above dust
09:05.5
09:12.6
select dust layer and change blend mode to screen
09:12.7
09:17.5
now we are going to add spark clip select spark clip
09:17.6
09:22.4
drag & drop above optical flare and change blend mode to screen
09:22.5
09:27.3
now we are going to create adjustment layer
09:27.4
09:32.2
click on new item & select adjustment layer
09:32.3
09:37.1
drag and drop adjustment layer above spark clip
09:37.2
09:42.0
select ajustment layer and go to blend mode
09:42.1
09:46.9
change blend mode to multiply and opacity to 70%
09:47.0
09:51.8
create another ajustment layer & drag & drop on top layer
09:51.9
09:56.7
increase layer duration to 12 sec
09:56.8
10:01.6
select adjustment layer to to effects section
10:01.7
10:06.5
search crop and drag it & drop it on adjustment layer
10:06.6
10:11.4
go to crop in effect cntrol panel and Change Top to 10%
10:11.5
10:16.6
and bottom to 10% now you can see cinematic bars
10:16.7
10:21.5
now we are going to add ash particles
10:21.6
10:26.4
select ash particle clip and drag & drop it above adjustment layer
10:26.5
10:31.3
Change blend to screen again select crop and
10:31.4
10:36.2
drop on ash layer and top to 10% and
10:36.3
10:41.1
bottom to 10 % new we select fog
10:41.2
10:46.0
it depends if you want to add fog or not
10:46.1
10:50.9
select fog and drop it on top layer
10:51.0
10:55.8
change blend mode to exclusion and scale to
10:55.9
11:00.7
200 and decrease opacity to 50%
11:00.8
11:05.6
now select crop and drop it on fog clip
11:05.7
11:10.5
crop on top 30% and bottom 30%
11:15.5
11:20.3
cut and delete excess clips to 12 secs
11:20.4
11:25.2
to delete select razor tool
11:25.3
11:30.1
to add background music select background music
11:30.2
11:35.0
drag and drop background music on audio layer 1
11:35.1
11:39.9
now we are going to export clip press Control+M
11:40.0
11:44.8
go to presets and select high quality 1080p
11:44.9
11:49.7
and press export